Save to Pinterest
 My neighbor invited me to a carnival-themed block party one sweltering July, and I volunteered to bring something nostalgic that would transport everyone back to childhood. Candy apples seemed perfect, but I'd never made them before—I'd only eaten them at fairs, watching vendors dunk fruit into glossy red syrup like it was magic. Standing in my kitchen with eight apples lined up like soldiers and a candy thermometer I'd just bought, I felt oddly nervous about something so simple. By the end of the afternoon, when a kid bit into one and the candy shell cracked with that perfect satisfying snap, I understood why these had been made the same way for generations.
I learned something important that first time: when my neighbor's daughter came into the kitchen and asked if she could help, I'd almost said no because I thought it was too risky. Instead, I let her insert the sticks into the apples while I handled the hot syrup, and her eyes lit up like she was participating in actual alchemy. That shared moment—her excitement mixed with my nervous concentration—turned a simple dessert into something memorable, and I've involved helpers ever since.
Ingredients
- Granny Smith or Gala apples (8 medium): The tartness of Granny Smith cuts through the intense sweetness beautifully, though any firm apple that won't bruise easily works fine—avoid red delicious because they're too soft.
- Granulated sugar (2 cups): This is your base for that signature glossy shell; don't substitute powdered sugar or the texture will be completely wrong.
- Light corn syrup (1 cup): This prevents crystallization and keeps the candy smooth and shiny; dark syrup will muddy your vibrant red color.
- Water (1/2 cup): Acts as the medium that dissolves the sugar and helps create that perfect hard-crack consistency.
- Red food coloring (1/2 tsp): Gel coloring gives more intense color than liquid, though either works—I've found that liquid is easier to stir in quickly when the syrup is hot.
- Wooden sticks (8): Make sure they're food-safe and long enough to give you something to hold onto without your fingers getting dangerously close to the hot candy.
- Nonstick cooking spray or parchment paper: This prevents the cooling apples from sticking and makes cleanup infinitely less painful.
Tired of Takeout? 🥡
Get 10 meals you can make faster than delivery arrives. Seriously.
One email. No spam. Unsubscribe anytime.
Instructions
- Set your stage:
- Line your baking sheet with parchment paper or hit it with nonstick spray—this single step saves you from standing there with a plastic scraper trying to pry hardened candy off a bare pan. Insert a stick firmly into each apple's stem end so it won't wiggle when you're dipping.
- Combine and heat your mixture:
- In your heavy saucepan, stir together the sugar, corn syrup, and water until it looks like wet sand. Place it over medium-high heat and don't walk away; clip your candy thermometer to the side of the pan once the mixture starts steaming.
- Watch it boil without interference:
- Once the mixture reaches a boil, resist every urge to stir—stirring causes crystallization and you'll end up with grainy, disappointing candy instead of that glossy glass-like shell. Just let it bubble away, checking the thermometer occasionally.
- Reach the hard-crack stage:
- The syrup needs to hit 300°F, which usually takes 15–20 minutes depending on your stove and weather. You'll know it's getting close when the mixture turns a pale amber color and the bubbles look bigger and slower.
- Add color while it's hot:
- The moment the thermometer hits 300°F, remove the pan from heat and immediately stir in your red coloring—it disperses faster into hot syrup and you'll get an even, vibrant color. Work quickly but carefully here; the syrup is dangerously hot.
- Dip with speed and caution:
- Tilt the saucepan slightly and dip each apple, rotating it to coat all sides evenly and letting excess drip back into the pan. Work as quickly as you can without burning yourself—if the coating starts to cool and thicken, you can gently reheat over low heat for a minute or two.
- Set them to cool:
- Place each dipped apple on your prepared baking sheet and leave them completely untouched for about 15 minutes. Don't try to move them, don't poke them, and definitely don't put them in the refrigerator—patience here is what gives you that satisfying hard shell.
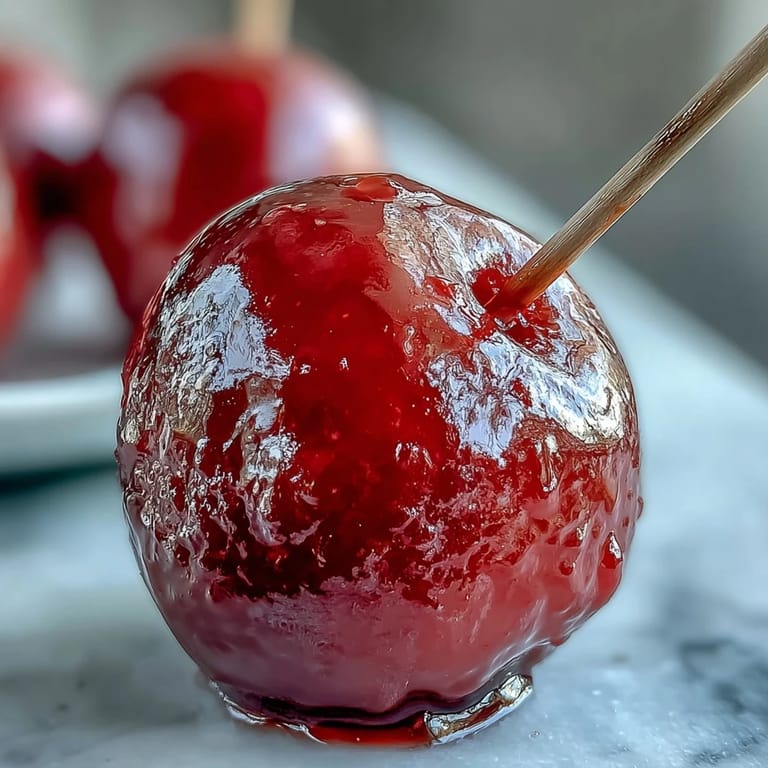 Save to Pinterest
 There's something almost meditative about watching the syrup bubble from clear to pale gold, knowing that in a few minutes you're going to transform an ordinary apple into something that looks like it came from a movie. When the candy shell hardens and you hand one to someone, watching their face as they bite into that satisfying crack—that's when food stops being about hunger and starts being about joy.
Decorating and Customization
The plain red candy apple is gorgeous on its own, but the moment those apples come out of the candy syrup and while the shell is still slightly tacky, you can roll them in toppings for texture and visual interest. Crushed peppermint candy gives a festive crunch, chopped toasted nuts add sophistication, and colorful sprinkles work if you want them to feel like carnival treats. I once got creative and pressed edible gold flakes into the sides of a batch for a dinner party, and people genuinely thought I'd spent hours on them.
Timing and Storage
These apples are best eaten within a few hours of making them, when the candy shell is still hard and snappy and hasn't started to soften from the natural moisture in the apple skin. If you need to make them ahead, store them in a cool, dry place (not the refrigerator, where condensation will make them weep) and plan to serve them the same day you make them. I've learned that trying to stretch these into the next day is a losing battle—they're meant to be immediate gratification.
Safety and Common Mistakes
Hot candy syrup at 300°F will cause serious burns, so treat this process with the respect it deserves and keep children watching rather than participating in the dipping stage. Keep a bowl of ice water nearby in case of splashes, and if the syrup starts to cool and thicken before you've dipped all your apples, a gentle 30-second reheat over low heat will get it back to the right consistency without ruining your batch. One other mistake I see people make is using wet apples or apples with waxy coating—a quick wash followed by thorough drying makes all the difference between a candy shell that clings and one that slides right off.
- Never leave hot syrup unattended, and always use a heavy-bottomed pan so the heat distributes evenly and prevents hot spots that can cause burning.
- If you see the candy mixture starting to crystallize or turn grainy, a tablespoon of corn syrup stirred in gently over low heat can sometimes save it.
- Granny Smith apples really do make the best contrast with the sweetness, but use whatever firm variety you have on hand—the technique matters more than the apple type.
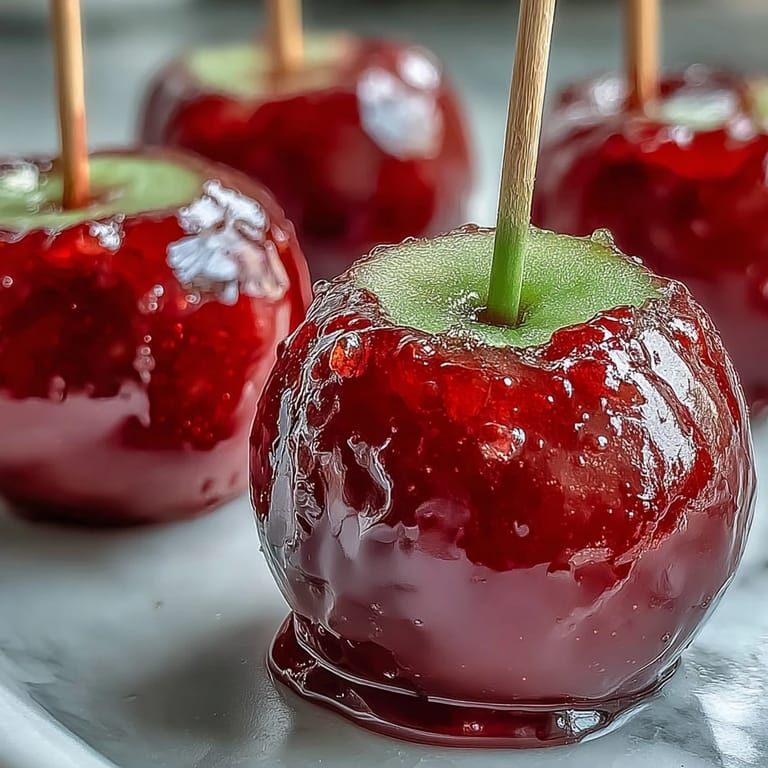 Save to Pinterest
 These candy apples have a way of bringing people back to simpler times and lighter moods, which is exactly what good food should do. Whether you're making them for a party, a state fair, or just because a Monday afternoon needs some brightness, they're worth the careful attention and the minor burns on your hands.
Recipe FAQs
- → What type of apples work best for coating?
Firm apples like Granny Smith or Gala are ideal because their texture holds well under the candy coating.
- → How do I know when the candy syrup is ready?
Boil the sugar mixture without stirring until it reaches 300°F (149°C) – known as the hard crack stage.
- → Can I add decorations to the candy coating?
Yes, rolling the apples in chopped nuts or sprinkles before the candy hardens adds flavor and texture.
- → What precautions should I take when working with hot syrup?
The syrup is extremely hot and can cause burns; use caution, and avoid splashing during dipping.
- → How long should the candy shell cool before serving?
Allow the coated apples to cool at room temperature for about 15 minutes until the candy hardens completely.
- → Can I reheat the syrup if it thickens before dipping?
Yes, gently reheat over low heat to restore the proper consistency for dipping.