 Save to Pinterest
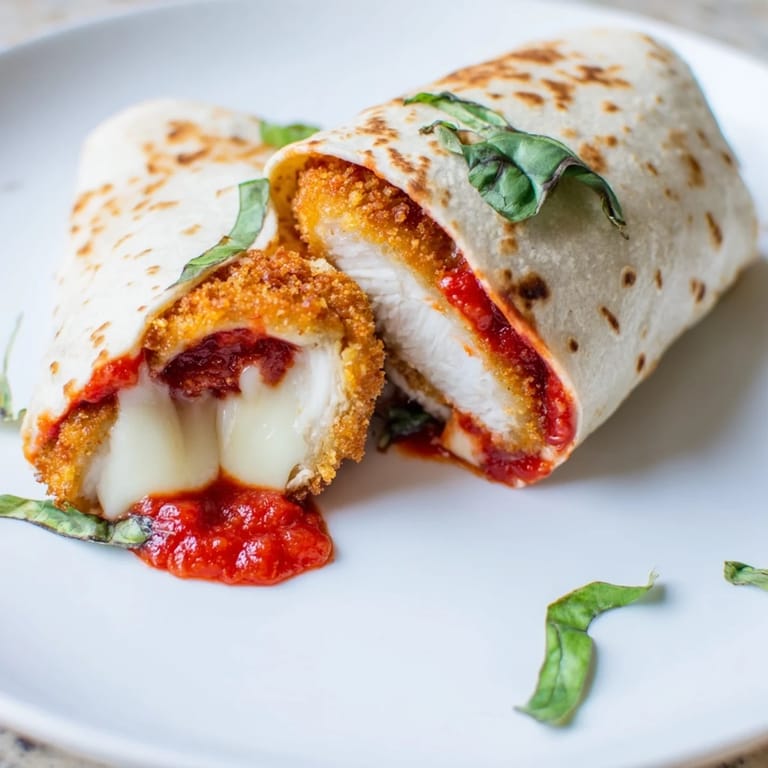
 My kitchen counter was a mess of breadcrumbs and flour dust when I realized I had tortillas but no sandwich bread. Instead of giving up on chicken parm night, I rolled everything into a wrap and something magic happened. The crispy chicken stayed intact, the cheese melted perfectly against the warm tortilla, and suddenly dinner became portable. My kids grabbed them with both hands and declared it better than the original. Sometimes the best recipes come from running out of the right ingredients at exactly the right time.
I first made these for a family movie night when everyone wanted something different. My teenager wanted Italian, my spouse wanted something quick, and I wanted fewer dishes to wash. These wraps solved everything and became our Friday night standard. Now when I pull out the breadcrumbs, everyone knows what is coming and the excitement is real.
Ingredients
- Boneless, skinless chicken breasts: Slicing them thin is the secret to quick cooking and even breading, plus thinner cutlets fit perfectly in the tortillas without bulging.
- All-purpose flour: This first coating helps the egg stick and creates that initial dry layer that makes the breading adhere beautifully.
- Eggs: Beaten eggs act like glue between the flour and breadcrumbs, and I learned that letting excess drip off prevents soggy spots.
- Italian-style breadcrumbs: The pre-seasoned kind saves time, but if you only have plain, just add extra herbs and you will never know the difference.
- Grated Parmesan cheese: Mixing it into the breading instead of just sprinkling on top adds a salty, nutty flavor that gets crispy and golden.
- Garlic powder, dried oregano, salt, and black pepper: These simple seasonings make the breading taste like it came from an Italian grandmother's kitchen.
- Vegetable oil: You need just enough to shallow fry, not deep fry, which keeps things manageable and less greasy.
- Large flour tortillas: Burrito-size tortillas are essential because anything smaller will tear when you try to wrap the chicken and toppings.
- Marinara sauce: Use your favorite brand or homemade, and warming it slightly before adding makes the cheese melt faster.
- Shredded mozzarella cheese: Low-moisture mozzarella melts without making the wrap soggy, which I learned after one watery disaster with fresh mozzarella.
- Fresh basil leaves: Optional but worth it for that bright, aromatic finish that makes everything taste more vibrant and restaurant-worthy.
Tired of Takeout? 🥡
Get 10 meals you can make faster than delivery arrives. Seriously.
One email. No spam. Unsubscribe anytime.
Instructions
- Prep the chicken:
- Slice each chicken breast horizontally to create four thin cutlets that cook quickly and evenly. If they are uneven, pound them gently with your palm to flatten.
- Set up your breading station:
- Arrange three shallow dishes in a row with flour in the first, beaten eggs in the second, and the breadcrumb mixture (breadcrumbs, Parmesan, garlic powder, oregano, salt, and pepper) in the third. This assembly line method keeps your hands from turning into breaded claws.
- Bread the cutlets:
- Dredge each cutlet in flour, shake off the excess, dip into the egg until fully coated, then press firmly into the breadcrumb mixture on both sides. The pressing part is key for a coating that does not fall off.
- Fry until golden:
- Heat the vegetable oil in a large skillet over medium-high heat and fry each cutlet for 3 to 4 minutes per side until deeply golden and cooked through. Let them drain on paper towels so they stay crispy instead of greasy.
- Clean and prep for assembly:
- Wipe out the skillet to remove any burnt breadcrumb bits. Warm your tortillas in a dry pan or microwave for about 15 seconds until they are soft and pliable.
- Build the wraps:
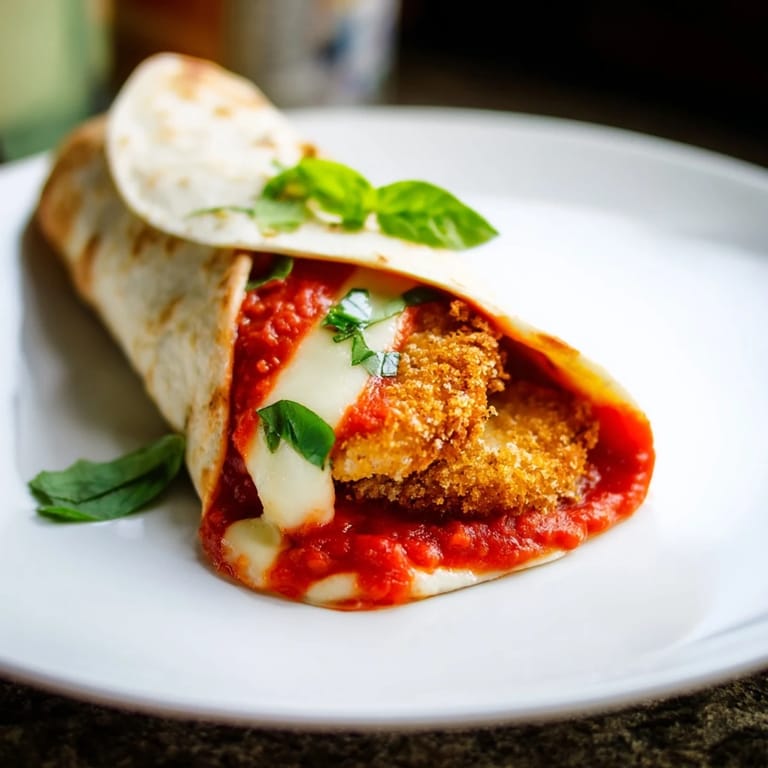
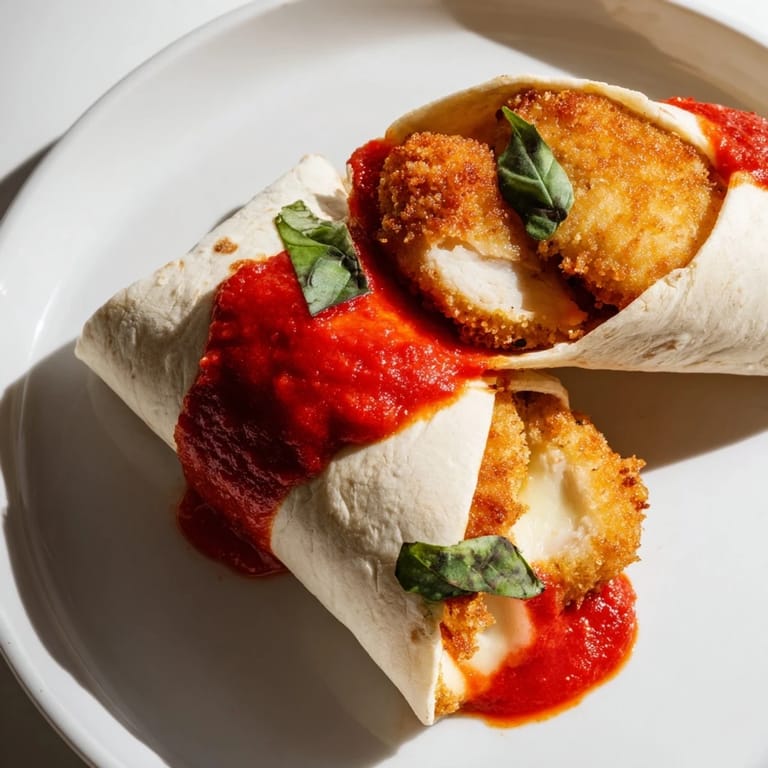
- Spread about a quarter of the marinara sauce down the center of each tortilla, place a crispy chicken cutlet on top, then sprinkle with mozzarella and fresh basil. Do not overfill or the wrap will not close properly.
- Roll them up:
- Fold in the left and right sides of the tortilla, then roll from the bottom up tightly like a burrito. Tuck as you go to keep everything snug inside.
- Crisp the wraps (optional but recommended):
- Place each wrap seam-side down in the skillet over medium heat and cook for 2 to 3 minutes per side until the tortilla turns golden and crispy and the cheese melts into gooey perfection. This step transforms a good wrap into a great one.
- Serve hot:
- Cut each wrap in half on a diagonal and serve immediately with extra marinara sauce on the side for dipping. The first bite should be hot, crispy, and utterly satisfying.
 Save to Pinterest
 One Sunday afternoon, I packed these wraps for a picnic and they held up beautifully in foil. My friend took one bite and asked for the recipe on the spot. That is when I realized this dish is not just convenient, it is genuinely crave-worthy and worth sharing.
Making It Your Own
If you want to switch things up, try swapping the chicken for turkey cutlets or even breaded eggplant slices for a vegetarian version. I have also added sautéed spinach and roasted red peppers when I had them on hand, and the extra vegetables made it feel healthier without losing any indulgence. You could even use a spicy marinara or add a drizzle of hot honey for a sweet-and-spicy kick that surprises everyone.
Storing and Reheating
These wraps keep well in the fridge for up to two days if you wrap them tightly in foil or plastic wrap. When you are ready to eat, reheat them in a skillet over medium heat instead of the microwave so the tortilla crisps back up and the cheese melts evenly. I have also frozen the breaded chicken cutlets before frying, which means you can pull them out and make fresh wraps anytime the craving hits.
Pairing Suggestions
A light Italian salad with arugula, cherry tomatoes, and a lemon vinaigrette balances the richness of the wrap perfectly. If you want something more substantial, serve them with roasted garlic parmesan fries or a simple pasta salad. A chilled glass of Pinot Grigio or sparkling water with lemon makes it feel like a real meal instead of just something you threw together on a weeknight.
- Serve with extra marinara sauce warmed up for dipping because everyone will want more.
- Add a sprinkle of red pepper flakes to the breading if you like a little heat.
- Use whole wheat tortillas for a slightly nuttier flavor and extra fiber.
 Save to Pinterest
 This wrap turned a classic comfort food into something I can actually take with me, and that small shift made it a weeknight hero. I hope it becomes one of those recipes you make over and over without even looking at the instructions.
Recipe FAQs
- → How do I keep the chicken crispy inside the wrap?
Fry the chicken until golden brown, then let it drain on paper towels before assembly. For extra crispness, optionally pan-toast the assembled wrap seam-side down for 2-3 minutes per side to seal and re-crisp the tortilla.
- → Can I prepare these ahead of time?
Yes, you can bread and fry the chicken cutlets up to 2 hours ahead. Assemble the wraps just before serving to maintain tortilla texture and cheese quality.
- → What's the best way to warm tortillas?
Heat tortillas in a dry skillet over medium heat for about 30 seconds per side, or wrap them in a damp paper towel and microwave for 20-30 seconds. This makes them pliable and easier to roll without tearing.
- → Can I use chicken thighs instead of breasts?
Absolutely. Thighs offer richer flavor and more forgiving cooking. Pound them to uniform thickness before breading and frying, adjusting cook time as needed based on thickness.
- → What are good side dish pairings?
Serve alongside a light Italian salad with vinaigrette, roasted vegetables like zucchini or bell peppers, or crispy fries. A chilled Pinot Grigio or Italian white wine complements the flavors beautifully.
- → How should I store leftovers?
Store assembled wraps in an airtight container in the refrigerator for up to 2 days. Reheat in a skillet over medium heat or wrap in foil and warm in a 350°F oven for 10-12 minutes to restore crispness.