Save to Pinterest
 My kitchen smelled like butter and crispy potatoes on a Tuesday morning when I first made these, standing in front of the oven with my coffee getting cold because I couldn't stop peeking through the window. There's something almost magical about turning shredded potatoes into golden cups that actually hold an egg without falling apart—it felt like a small kitchen victory I hadn't expected. Now they're my go-to when I want breakfast to feel special without spending the whole morning cooking.
I made these for my neighbor one Saturday when she mentioned she'd been eating cereal for a week straight, and watching her face when she pulled one out of the muffin tin warm and golden—cheese melted into every corner—made me realize this recipe was worth keeping around. She's made them three times since, texted me photos of her attempts, and asked if I'd noticed how the edges got extra crispy if you pressed harder when forming the nests.
Ingredients
- Russet potatoes, shredded: These are starchy enough to hold their shape without turning mushy, and their subtle sweetness balances the salty cheese beautifully—I always rinse and squeeze mine extra dry in a clean kitchen towel because any moisture will make them steam instead of crisp.
- Melted butter: This coats every strand of potato so they brown evenly and develop that golden, crispy edge you're really after.
- Cheddar cheese: Sharp cheddar adds a bold flavor that doesn't get lost, though Swiss is wonderful if you want something milder and more elegant.
- Eggs: Use fresh, good eggs if you can—the yolk color will be richer and they'll taste noticeably better when they're the star of the plate.
- Scallions or chives: These add a fresh, gentle onion flavor that brightens everything without overpowering the crispy potatoes and creamy yolk.
- Salt and black pepper: Season the potatoes themselves, not just the egg—this is where most people miss a flavor opportunity.
Tired of Takeout? 🥡
Get 10 meals you can make faster than delivery arrives. Seriously.
One email. No spam. Unsubscribe anytime.
Instructions
- Get your nests ready to bake:
- Preheat your oven to 400°F and grease a muffin tin well—I use butter because it tastes better than spray and gives a little insurance against sticking. Mix your shredded potatoes with salt, pepper, and melted butter, then press about a quarter cup firmly into each cup, pressing up the sides like you're building tiny edible bowls.
- Bake the potato foundation:
- This first bake, 15 to 20 minutes, is where the magic starts—you want the edges golden and starting to crisp while the insides stay tender enough to hold an egg. The edges will feel a little firm when you touch them.
- Add cheese and aromatics:
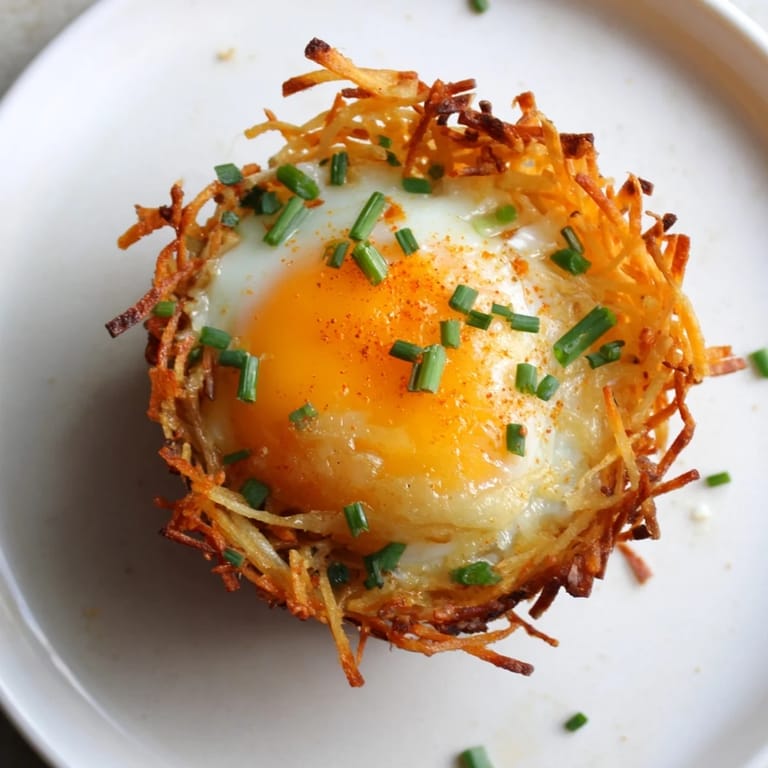
- Pull the nests out, sprinkle in some cheese and scallions, then crack one egg into each cup like you're tucking it into bed. Top with more cheese, remaining scallions, and paprika if you like the warmth it adds.
- Finish in the oven:
- Back it goes for 10 to 12 minutes—watch it the last couple minutes because eggs go from runny to overdone faster than you'd think. You want the whites set but the yolk still soft enough that it flows a little when you break into it.
- Cool and release:
- Let them sit for a few minutes so everything sets up slightly, then run a butter knife around each nest and gently lift out. They'll firm up as they cool and become much easier to handle.
 Save to Pinterest
 My daughter declared these her favorite breakfast last month and has requested them every weekend since, which means I've been making them in my sleep at this point. There's something about a meal you can eat with your hands while standing at the kitchen counter that makes everyone in the house happier, and these feel just a little bit fancy without the fuss.
Flavor Combinations That Work
Once you've nailed the basic version, this is where it gets fun—I've added everything from crispy bacon crumbles to sautéed mushrooms and peppers, and honestly every combination has been delicious. The potato and egg base is forgiving enough to play with, so don't be afraid to improvise based on what's in your fridge. Swiss cheese brings elegance, pepper jack adds heat, and cheddar is the reliable friend who's always the right call.
Make-Ahead and Storage
You can actually prep the potato nests the night before, cover the muffin tin with plastic wrap, and bake them fresh in the morning—just add a minute or two to the first bake if they're cold from the fridge. Baked nests reheat beautifully in a 350°F oven for about 5 minutes, though honestly they're best fresh and warm right out of the tin.
Serving Ideas and Timing
These are perfect for a leisurely weekend breakfast when you want something that looks restaurant-quality but doesn't require you to stand over the stove flipping and stirring. Serve them warm with a drizzle of hot sauce, a green salad on the side, or fresh berries if you want to balance the richness with something bright and tart. They're also wonderful for meal prep if you're cooking for a crowd—make a double batch and reheat throughout the week.
- A squeeze of fresh lemon on top adds brightness you won't expect but will love.
- Pair with a simple green salad dressed lightly with vinaigrette for a more complete breakfast.
- Hot sauce is optional but honestly transforms the whole experience.
 Save to Pinterest
 These little breakfast cups have become my answer to weekday mornings when everyone wants something that tastes special but I don't have an hour to spend in the kitchen. They're proof that the simplest meals—potatoes, eggs, cheese—are often the ones worth making again and again.
Recipe FAQs
- → How do I make the potato nests crispy?
Press shredded potatoes firmly into the muffin tin and bake them until the edges turn golden and crisp before adding the eggs.
- → Can I substitute cheddar cheese with others?
Yes, Swiss, mozzarella, or pepper jack can be used for different flavor profiles.
- → How do I prevent the nests from sticking to the pan?
Grease the muffin tin well with butter or nonstick spray before pressing in the potatoes.
- → What can I add to the filling for variety?
Cooked bacon, sautéed vegetables, or different herbs like chives enhance flavor and texture.
- → Can these be prepared ahead of time?
You can bake the nests a bit ahead, then add the filling and bake again just before serving for freshness.