 Save to Pinterest
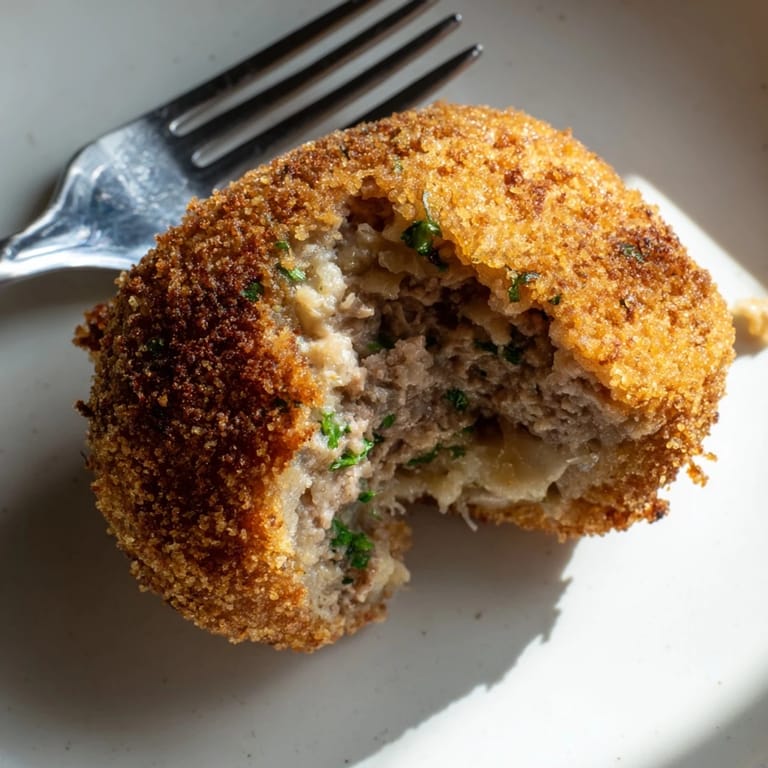
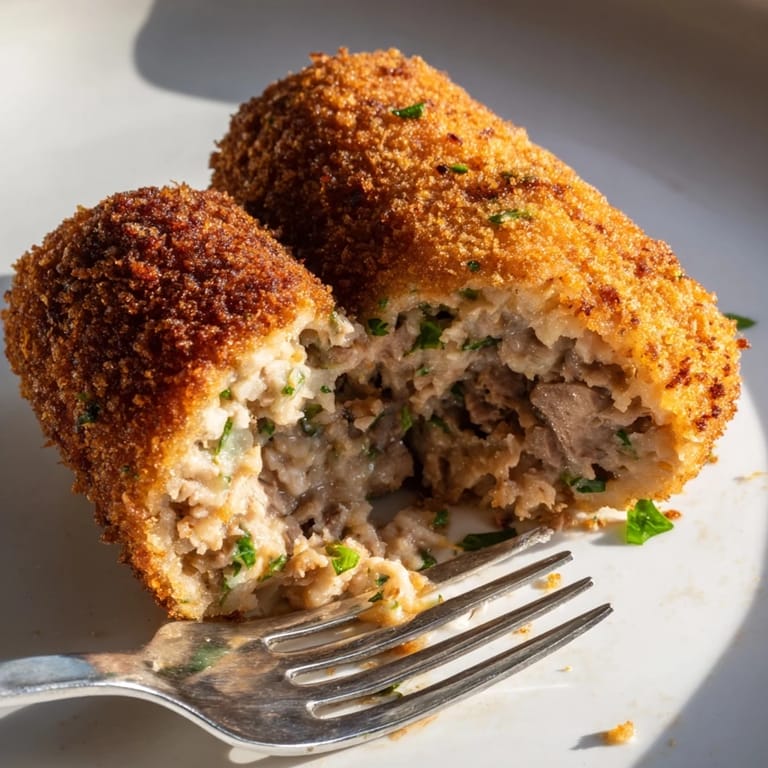
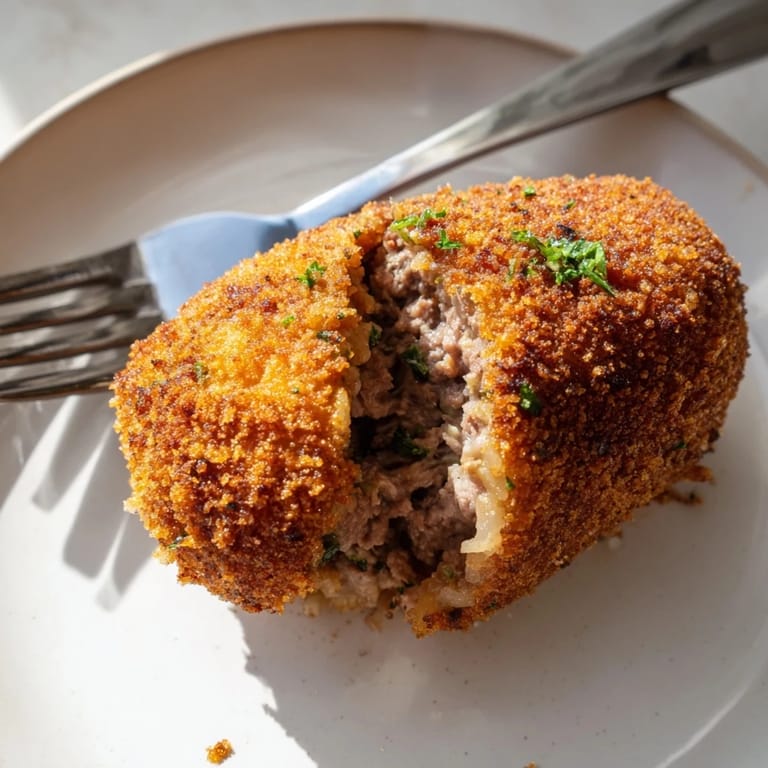
 My first Dutch croquette came by surprise at a tiny café in Amsterdam, served alongside an enormous pile of fries and a small cup of mustard. I bit into the golden shell and found myself in that perfect moment when crispy gives way to something impossibly creamy and savory inside. Years later, I finally understood what made them so good: the filling isn't just seasoned beef, it's a slow-cooked ragout bound into clouds of silky béchamel, then chilled until it holds its shape, then breaded and fried until the outside shatters between your teeth. Once you make them at home, you'll realize why Dutch people treat these like we treat comfort food.
I made these for a dinner party last winter, and watching my guests crack through that golden crust and discover the warm, savory center inside felt like sharing a small secret. One friend asked if I'd bought them from a bakery, which was exactly the kind of compliment that made the hour of simmering beef worth it. The kitchen smelled incredible the whole time—beef broth, nutmeg, and toasted breadcrumbs creating layers of aroma that no dessert could match.
Ingredients
- Stewing beef (250 g): Cut into small cubes so it breaks down into shreds after simmering; chuck or shoulder work beautifully and become impossibly tender.
- Beef broth (500 ml): Use quality broth if you can—it becomes the soul of your filling, so skip the bland stuff.
- Bay leaf: One leaf perfumes the entire pot without announcing itself; remove it before the final steps.
- Onion (1 small, finely chopped): Adds sweetness and depth; cook it until it's completely soft before adding the beef.
- Butter (1 tbsp for beef, 40 g for roux): Use unsalted so you control the salt level throughout.
- All-purpose flour (40 g): Creates the roux base that thickens and enriches the whole filling.
- Whole milk (150 ml): Transforms the roux into silky béchamel; whole milk gives better body than lower-fat versions.
- Ground nutmeg (1/2 tsp): Just a whisper prevents the filling from tasting one-dimensional; don't skip it.
- Fresh parsley (1 tbsp, optional): Adds a bright note if you want it, but the croquettes are perfect without it.
- Eggs (2 large): Your binding agent for the breadcrumb coating; beat them gently before you dip.
- Fine breadcrumbs (150 g): Panko or Dutch paneermeel creates the crispiest crust; regular breadcrumbs work but won't shatter quite the same way.
- Neutral oil: Sunflower or canola works best; avoid olive oil since high heat breaks down its flavor.
Tired of Takeout? 🥡
Get 10 meals you can make faster than delivery arrives. Seriously.
One email. No spam. Unsubscribe anytime.
Instructions
- Simmer the beef until it falls apart:
- Combine cubed beef, broth, bay leaf, and salt in a saucepan and bring to a boil, then drop the heat to a gentle simmer for about an hour. You'll know it's ready when a fork easily shreds the meat without resistance. Reserve 200 ml of the cooking liquid for later—this becomes your ragout base.
- Build the flavor with onion and beef:
- Melt 1 tablespoon of butter in a skillet and sauté the chopped onion until it turns translucent and soft, about three minutes. Add your shredded beef and stir everything together, tasting and adjusting salt and pepper as you go.
- Make the béchamel that binds everything:
- In a fresh saucepan, melt 40 grams of butter over low heat, then whisk in the flour, stirring constantly for two minutes to cook out the raw flour taste. Gradually add the reserved beef broth and milk, whisking constantly to avoid lumps, until the sauce thickens into something silky and smooth.
- Combine beef and sauce into a creamy ragout:
- Pour the béchamel over the beef-onion mixture, add the nutmeg and parsley if using, and stir until everything is evenly coated. The mixture should be thick enough that a spoon leaves a trail; spread it into a shallow dish, cover it, and chill for at least an hour until it's firm enough to shape.
- Shape the croquettes into cylinders:
- Once the filling is completely cold, use your hands or two spoons to form it into 10 cylinders about 8 centimeters long. If the filling is too soft, chill it longer—patience here prevents frustration during breading.
- Bread each croquette with a double coating:
- Set up three shallow bowls with flour, beaten egg, and breadcrumbs. Roll each croquette in flour first, then dip in egg, then coat in breadcrumbs; for extra crispiness, dip in egg again and coat once more in breadcrumbs. The double coating creates that shattering crust that makes croquettes worth making.
- Fry until golden and crispy:
- Heat your oil to 180°C (350°F) in a deep fryer or heavy pot. Fry the croquettes in batches of three or four for three to four minutes, turning gently halfway through, until they're deep golden brown on all sides. Drain them on paper towels while they cool slightly.
- Serve while still warm:
- Transfer to a warm plate and serve with mustard, mayonnaise, or whatever dipping sauce calls to you. These are best eaten fresh, but leftovers reheat beautifully in a 180°C oven for about five minutes.
 Save to Pinterest
 I remember standing in my kitchen on a random Tuesday evening, pulling a batch of croquettes from the oil and watching them drain on paper towels, the whole apartment filled with that toasted, savory smell. It hit me then that these weren't just snacks or appetizers—they were proof that the simplest ingredients, treated with patience and care, become something special enough to remember.
Make-Ahead Magic
One of the best discoveries I made while perfecting these is that you can bread them hours ahead or even freeze them for weeks. Shape and bread your croquettes in the morning, cover them with parchment paper, and refrigerate until evening—the coating actually adheres better after sitting. Or freeze the breaded croquettes on a baking sheet until solid, then transfer to a bag; fry them straight from frozen, adding just an extra minute or two to the cooking time. This turns an impressive appetizer into something manageable even when you're cooking for a crowd.
The Filling Matters Most
The magic of a great croquette lives entirely in the filling. Too many recipes rush the beef-simmering step or make a thin, runny ragout that slides out when you bite down. The beef needs time to become so tender it practically dissolves, and the béchamel needs to be thick and luxurious, almost stiff. When the beef and cream are in perfect balance, that's when you get those moments where someone bites through the crust and their eyes go wide with surprise. I learned this the hard way by making them poorly once and never forgetting the difference.
Frying Tips and Tricks
The final step—frying—is where everything comes together or falls apart. Keep your oil temperature steady at 180°C; a kitchen thermometer is your best friend here. Work in small batches so the oil doesn't cool down when you add new croquettes, and resist the urge to flip them constantly. Turn them once, gently, and let them develop that golden-brown shell without burning. When they're done, they'll float slightly higher in the oil and have a deep, rich color that promises crispiness.
- Test your oil temperature with a small bread cube; it should brown in about 30 seconds.
- Let finished croquettes rest on paper towels for a minute before serving so excess oil drains away.
- Serve them within an hour of frying for the best texture, though they're still delicious reheated in a 180°C oven.
 Save to Pinterest
 There's something deeply satisfying about making croquettes at home—about understanding why they taste the way they do and being able to recreate that crispy-creamy perfection whenever you want. Once you've made them, you'll find yourself reaching for this recipe again and again.
Recipe FAQs
- → What cut of beef is best for the filling?
Stewing beef such as chuck is preferred due to its tenderness after slow cooking, making the filling rich and soft.
- → How do I achieve a creamy interior?
The filling combines slow-cooked beef with a roux-based sauce using butter, flour, and milk, which thickens into a smooth ragout.
- → What is the ideal frying temperature?
Heat oil to 180°C (350°F) to ensure the croquettes develop a golden, crisp crust without absorbing excess oil.
- → Can croquettes be prepared in advance?
Yes, filling can be made ahead and chilled or frozen after breading; fry directly from frozen with a slightly longer cooking time.
- → What breadcrumbs work best for coating?
Fine dry breadcrumbs, preferably Panko or Dutch paneermeel, provide an extra crispy texture when fried.