 Save to Pinterest
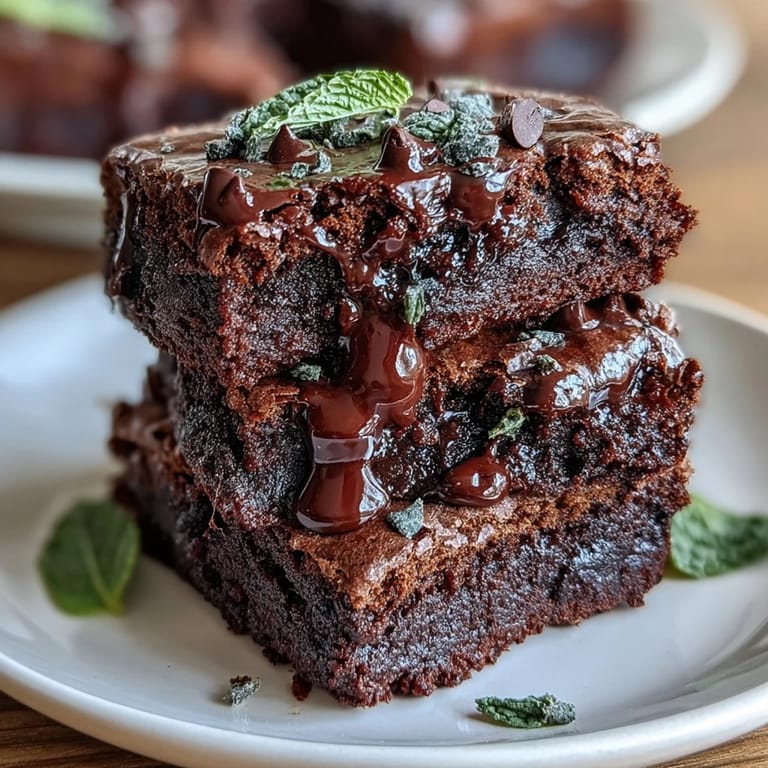
 My kitchen smelled like a candy shop had exploded when I first decided to swirl mint and chocolate together for St. Patrick's Day. I'd been scrolling through old family photos and landed on one from a March party where someone brought these impossibly fudgy little bites, and suddenly I was determined to recreate them. The trick, I'd eventually learn, isn't just throwing mint extract at brownies and calling it festive. There's a delicate balance between that cool peppermint tingle and the deep cocoa that makes people pause mid-chew and ask what exactly makes these so good. These brownie bites became my answer to anyone looking for something special that doesn't require hours in the kitchen.
I made these for my coworker's desk on a random Wednesday in March, and watching her face light up when she bit into one felt like winning some unspoken kitchen award. She asked for the recipe three times, and when I finally texted it to her, she sent back a selfie holding one with an unreasonably happy expression. That's when I knew these weren't just brownies—they were the kind of thing that makes someone's day feel a little more special.
Ingredients
- All-purpose flour (3/4 cup): The foundation that keeps these from being dense chocolate mud, though you want to fold gently so it doesn't get tough.
- Unsweetened cocoa powder (1/2 cup): This is where the chocolate intensity lives—don't skip this or use the sweet stuff, it completely changes the balance.
- Baking powder (1/2 tsp): Just enough lift to make them tender without making them cakey.
- Salt (1/4 tsp): This tiny amount wakes up the chocolate and makes the mint pop, trust me on this.
- Unsalted butter, melted (1/2 cup): Cooling it slightly prevents scrambling your eggs, which is worth the extra minute of patience.
- Granulated sugar (1 cup): The sweetness that balances the mint and cocoa without overwhelming either one.
- Large eggs (2), room temperature: Room temperature eggs mix smoother and incorporate better than cold ones straight from the fridge.
- Pure vanilla extract (1/2 tsp): Use pure, not imitation, because it adds depth to everything else happening here.
- Peppermint extract (1/2 tsp): Start here and taste the batter if you want more—it's easy to overdo this and end up with toothpaste brownies.
- Green food coloring (2–3 drops, optional): Makes them visibly festive without any actual flavor impact.
- Mini chocolate chips (1/2 cup plus extra for topping): The mini size distributes better than regular chips, and the extra topping gives you pockets of chocolate in every bite.
- Andes mints or mint chocolate pieces (1/4 cup, optional): These melt slightly into the batter and intensify the mint experience without tasting artificial.
Tired of Takeout? 🥡
Get 10 meals you can make faster than delivery arrives. Seriously.
One email. No spam. Unsubscribe anytime.
Instructions
- Prep your tin and heat your oven:
- Set the oven to 350°F and either grease your mini muffin tin with butter or slip in liners—the liners make cleanup disappear, which matters more than you'd think after baking. This temperature is the sweet spot for getting fudgy centers without burning the edges.
- Combine the dry team:
- Whisk flour, cocoa powder, baking powder, and salt together in a medium bowl, making sure there are no cocoa clumps hiding in the mix. This pre-mixing prevents streaks of cocoa in your final bites.
- Build the wet base:
- In a large bowl, whisk the melted butter with sugar until they're genuinely combined, then add your room-temperature eggs one at a time, whisking well after each. Add both extracts and food coloring if using, and mix until the batter is smooth and starting to look a bit pale.
- Marry the wet and dry:
- Gently fold the dry mixture into the wet mixture using a spatula, stirring just until you don't see flour streaks anymore—overmixing is the enemy of fudginess here. You want something that looks like thick brownie batter, not cake batter.
- Load in the chocolate and mint:
- Fold in your mini chocolate chips and chopped Andes mints if you're using them, distributing them evenly through the batter so every bite has a fighting chance of hitting chocolate.
- Fill and top:
- Spoon batter into each mini muffin cup until it's about three-quarters full, then scatter a few extra chocolate chips on top of each one for that Instagram moment. Don't overfill or they'll dome and crack, which isn't the end of the world but isn't elegant either.
- Bake with patience:
- Bake for 13 to 15 minutes, checking at the 13-minute mark by inserting a toothpick into the center of one—you want it to come out with a few moist crumbs still clinging to it, not clean and not gooey. The brownies will continue cooking slightly as they cool, so don't panic if they look underbaked.
- Cool gradually:
- Let them sit in the tin for 5 minutes to set up, then transfer them to a wire rack to cool completely so the centers firm up properly. This waiting is torture, but it's worth it.
 Save to Pinterest
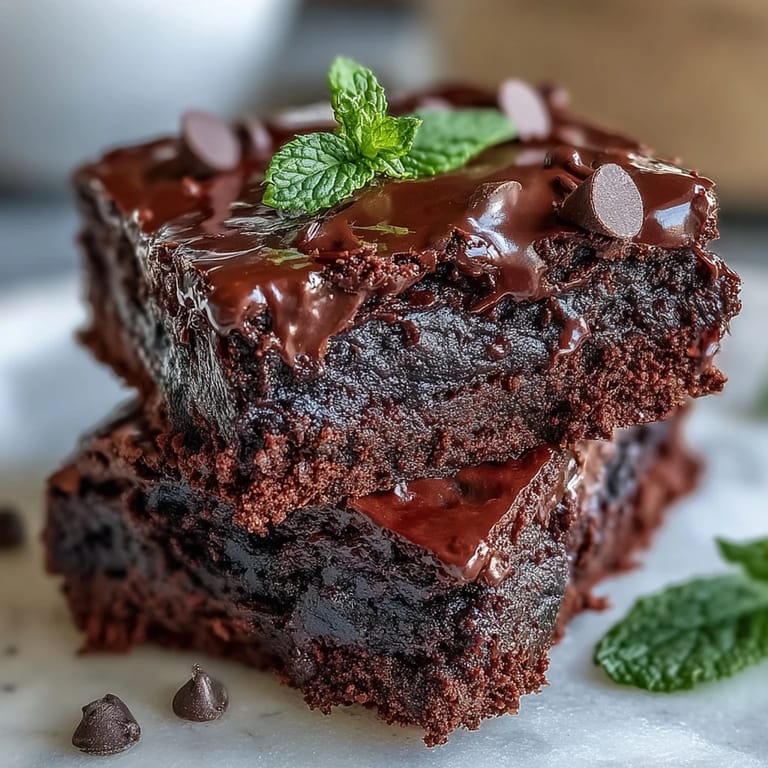
 These brownie bites somehow became the thing people requested instead of cake at St. Patrick's Day gatherings, which felt like a small victory in the kitchen wars. There's something about handing someone a tiny, fudgy bite that tastes more special than it should that makes you feel like a decent cook.
The Mint and Chocolate Chemistry
Mint and chocolate have been a flavor team since before I was born, but understanding why they work so well together actually changes how you approach this recipe. The cold sensation of mint makes your palate reset, so each piece of chocolate tastes almost fresh, like you're eating it for the first time. When you nail this balance, people can't quite put their finger on what makes these better than regular brownies until they realize the subtle cooling sensation isn't gimmicky—it's genius.
Make-Ahead and Storage Strategy
I've made these up to three days before an event and stored them in an airtight container at room temperature, and they stayed fudgy and delicious the entire time. The batter can also be made a few hours ahead and kept in the fridge, though you might add a minute or two to the baking time since it'll be cold. The real magic is they taste even better the next day once all the flavors have had time to meld and settle.
Flavor Variations and Experiments
Once you master the basic version, these bites become your playground for mint and chocolate creativity. You can swap the peppermint extract for crème de menthe (about 1/2 teaspoon), use crushed candy canes instead of Andes mints for a different texture, or even add a pinch of espresso powder to deepen the chocolate without making them taste like coffee. The foundation is so solid that you can nudge the flavors around and still end up with something delicious.
- If you can't find mini chocolate chips, use regular chips but chop them slightly smaller so they distribute evenly.
- Keep the peppermint extract between 1/2 and 3/4 teaspoon unless you actually love that intense mint-toothpaste vibe.
- Room temperature eggs and melted butter that's cooled slightly are non-negotiable if you want the texture right.
 Save to Pinterest
 These brownie bites remind me why small, focused recipes often have more personality than elaborate ones. They're proof that you don't need hours in the kitchen or a long ingredient list to make something that genuinely delights the people you bake for.
Recipe FAQs
- → What gives these brownie bites their mint flavor?
The mint flavor comes from pure peppermint extract and optional chopped Andes mints or mint chocolate pieces.
- → Can I use regular chocolate chips instead of mini?
Yes, regular chocolate chips can be used, but mini chips distribute more evenly throughout the batter.
- → How do I achieve the bright green color?
Add 2–3 drops of green food coloring to the wet ingredients for a festive touch.
- → What texture should I expect from these brownie bites?
They are fudgy and moist with a tender crumb, complemented by gooey chocolate chips.
- → How should these bites be stored?
Keep them in an airtight container at room temperature for up to five days to maintain freshness.