Save to Pinterest
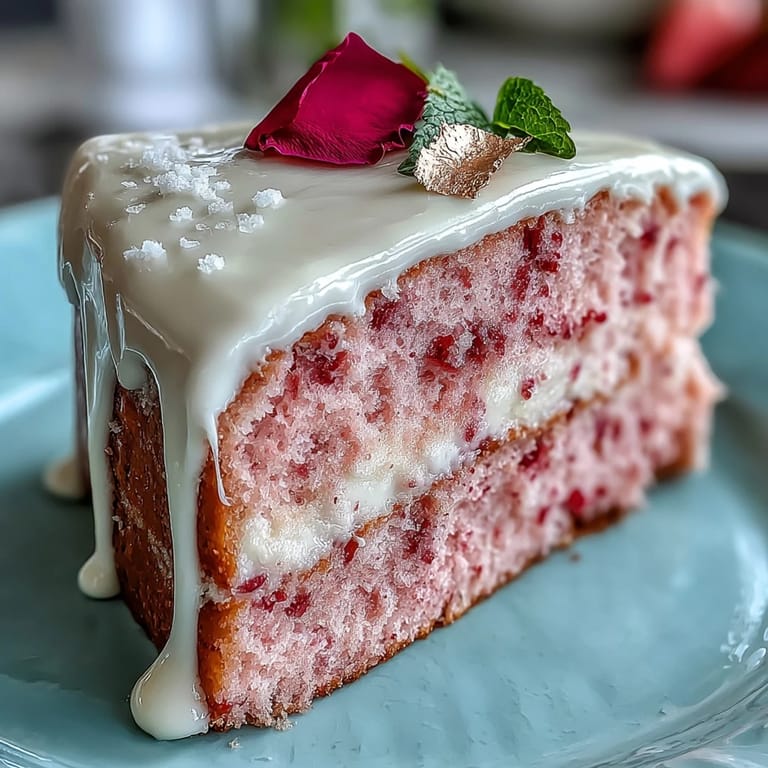
 The aroma of rosé mingling with the warm scent of cake was the surprise I didn't know I needed until I pulled the first Bridal Shower Rosé Velvet Cake from the oven. I’d never baked with wine before, and I remember the faint fizz of anticipation (and the cork!) as I added the blush pink splash to my mixing bowl. Instead of drama, what followed was a calm sort of alchemy—the weather outside was gloomy, but every surface in the kitchen seemed to sparkle a bit brighter with the promise of something special in the oven. As the cake cooled and I daubed on the gold drip, the shimmer on my hands felt like a secret celebration before guests ever arrived.
A group of us tried our best to keep straight faces at the bridal shower, but as the cake was sliced and golden drips gleamed in the afternoon light, every phone came out to capture a piece. Someone smuggled an extra portion for the car ride home, declaring it too pretty to leave behind. That’s how you know it’s become a memory: laughter, a shared fork, and a bit of glitter on everyone's fingers.
Ingredients
- All-purpose flour: Sift it well to keep your crumb light—clumpy flour is the enemy of elegance.
- Granulated sugar: It’s more than sweetener; creaming it with the wet ingredients helps set the cake’s moist, tender base.
- Baking soda: Just a teaspoon wakes up the batter and ensures each layer rises evenly.
- Fine salt: Don’t skip it—it highlights the rosé’s floral notes without making the cake taste “salty.”
- Cocoa powder (unsweetened): Only a tablespoon, but it pulls everything together with a faint whisper of depth; sift it for a lump-free batter.
- Vegetable oil: For a plush, velvety crumb—don’t substitute with butter or your cake might dry out.
- Large eggs, room temperature: They emulsify better when not chilled, making the batter silky smooth.
- Buttermilk, room temperature: The acids help the cake stay fluffy even if you over-mix a touch—be generous and use the real deal, not milk with lemon juice.
- Rosé wine: Pick a dry or sparkling style for best results; use cold straight from the bottle to preserve fresh flavor.
- Vanilla extract: A double whiff gives depth to both cake and buttercream.
- White vinegar: A couple teaspoons lighten the crumb; add it last to activate everything.
- Pink or rose gel food coloring: Go gently at first, swirling in more until you see the exact perfect hue.
- Unsalted butter, room temperature: Essential for a buttercream that whips up cloud-like and pipes beautifully.
- Powdered sugar, sifted: Clumps are the enemy—always sift for a smoother finish that melts on the tongue.
- Heavy cream: Just a touch loosens the drip, making it pourable but not runny.
- White chocolate chips: They set the stage for that glam gold finish; choose a good-quality brand.
- Edible gold luster dust: Do NOT use crafting gold, even if it’s tempting, and use as little vodka or lemon extract as possible for best shine.
Tired of Takeout? 🥡
Get 10 meals you can make faster than delivery arrives. Seriously.
One email. No spam. Unsubscribe anytime.
Instructions
- Prep the pans and oven:
- Preheat the oven to 350°F, grease three 8-inch cake pans thoroughly, and line them with parchment so your layers slip right out—nothing slows you down like a stuck cake.
- Mix the dry ingredients:
- Grab your biggest bowl and sift together the flour, sugar, baking soda, salt, and cocoa powder; listen for the soft “whump” as the dry blend falls like powdery snow.
- Combine the wet ingredients:
- In a separate bowl, whisk the oil, eggs, buttermilk, rosé, vanilla, and vinegar together until the color is golden and the texture silky, almost glossy.
- Make the batter rosy:
- Stir the wet mixture into the dry ingredients, then swirl in pink gel coloring, a little at a time, until you’ve conjured up just the right blush shade for your occasion.
- Divide and bake:
- Pour the batter evenly into your pans—the batter will be thick but pourable; bake for 30-35 minutes, just until a toothpick inserted comes out with a few moist crumbs.
- Cool the layers:
- Let the cakes rest in their pans for 10 minutes, then gently run a knife around the edge and invert onto a rack to finish cooling completely.
- Make the rosé buttercream:
- Whip the butter until fluffy, then mix in powdered sugar one cup at a time; drizzle in rosé, vanilla, and salt, beating until everything is creamy, light, and just holds its shape.
- Assemble and crumb coat:
- Level the cooled cakes, stack them with buttercream between layers, and spread a thin “crumb coat” around the outside; chill for 20 minutes so you don’t end up chasing runaway crumbs.
- Finish the buttercream:
- Cover the cake with the final layer of buttercream, smoothing with an offset spatula and dreaming up how your golden drip will cascade over the sides.
- Create the gold drip:
- Melt white chocolate chips and heavy cream together and let cool until barely warm; paint the gold luster dust with vodka or lemon extract, then pour or spoon the chocolate along the cake’s edges so it glides down in gentle rivulets.
- Decorate and shine:
- Once the drips set, use a food-safe brush to paint on the gold; pile on rose petals or berries if you’re feeling extravagant, and step back to admire the masterpiece.
 Save to Pinterest
  Save to Pinterest
 After the party, the cake plate was empty but for a few shimmer flecks and rose petals—proof that this bake turns a gathering into an event. Sometimes, sharing a slice feels like sharing a toast to all things celebratory and sweet.
Making Rosé Buttercream Less Intimidating
The first time I tried rosé in buttercream I was certain it would curdle, but if you pour the wine in slowly while beating, the mixture stays perfectly creamy and pale pink. Let the butter come to room temperature naturally rather than microwaving; patience brings out the smoothest swirl and the prettiest color.
Decorating Without Fear
Gold drips might sound complicated, but a steady hand and a little confidence are all you need—many of my ‘mistakes’ turned into happy little accents once I added rose petals and berries. If you do make a drip too thick, just warm your offset spatula to gently nudge it along the edge.
Troubleshooting Quick Fixes
Sometimes the cake crumb sticks to the frosting—don’t panic, just tuck in a few edible blooms or swirl extra buttercream over any rough spots, and nobody will notice. Refrigerating for 20 minutes between coats saves your nerves as much as your design.
- If your buttercream feels too stiff, a splash more rosé helps it relax perfectly.
- Always use a squeeze bottle or piping bag for the cleanest gold drip, but a spoon works in a pinch.
- Set aside a few extra rose petals for last-second touch ups or for photos—they make everything more effortless.
 Save to Pinterest
 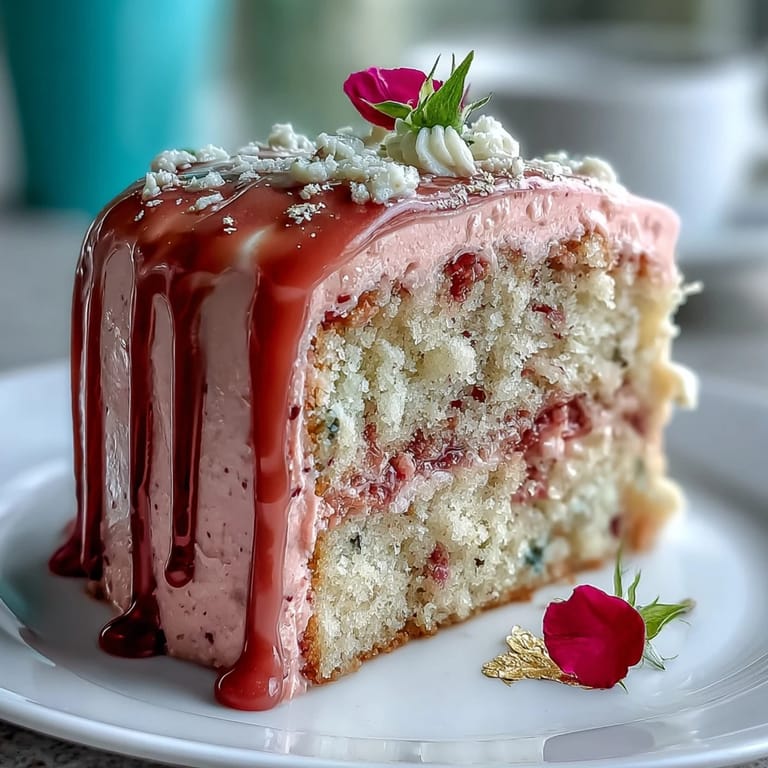 Save to Pinterest
 Baking this Rosé Velvet Cake feels like sneaking a bit of celebration into every forkful—perfect for toasts, milestones, or just because you’re feeling fancy today.
Recipe FAQs
- → Can I omit the alcohol and keep the same flavor?
Yes. Substitute rosé with equal parts strong peach or white grape juice, or use 1–2 teaspoons of clear lemon extract mixed with a splash of juice. Adjust sweetness and texture by reducing liquid slightly if needed.
- → How do I get a vibrant, even pink crumb?
Use concentrated gel food coloring and add it to the wet ingredients until you reach the desired shade. Be cautious with liquid food coloring to avoid thinning the batter; gel gives better color without altering texture.
- → What makes a stable gold drip?
Use a cooled white-chocolate ganache (white chocolate and cream) that still flows slowly. Test temperature on the side of a bowl—too hot will run off, too cool will clump. Mix edible luster dust with a clear, food-safe alcohol or lemon extract for painting.
- → How far ahead can I make the layers and frosting?
You can bake the layers a day ahead and store wrapped in the refrigerator. Assemble and frost the cake the next day; chilling between crumb coat and final coat helps maintain clean edges and makes the drip easier to apply.
- → Why are vinegar and baking soda used in this batter?
The vinegar reacts with baking soda to produce lift, yielding a lighter crumb and helping the cocoa and rosé flavors bloom. In buttermilk-based batters, the acid also balances sweetness and enhances tenderness.
- → Is sparkling rosé recommended?
Sparkling rosé adds a bright, effervescent note that concentrates during baking; it can enhance floral and fruit nuances. Use a dry sparkling rosé if you prefer less sweetness.