 Save to Pinterest
 Last summer, my neighbor showed up with a platter of these pesto chicken sliders at our backyard gathering, and I watched them disappear faster than the ice in anyone's drink. She pulled me aside later and admitted she'd thrown them together in about forty minutes, using ingredients she already had on hand. That's when I realized these little sandwiches weren't just impressive—they were actually manageable, even when feeding a crowd who suddenly decides to stay longer than planned.
My daughter asked me to bring sliders to her soccer team's end-of-season celebration, and I'll admit I was nervous about feeding teenagers with picky palates. But something about the combination of pesto, chicken, and cheese just works—even the kid who claims to hate green stuff ate three of them before asking what was in them.
Ingredients
- Boneless, skinless chicken breasts: Cut into twelve even pieces so they cook at the same rate and fit perfectly inside those mini brioche cups without spilling out during assembly.
- Olive oil: Use something you wouldn't reserve for salads, since we're baking it and high heat makes fancy oil taste a bit off.
- Garlic powder, salt, and black pepper: These are your seasoning foundation, working quietly behind the pesto and marinara so nothing tastes flat.
- Panko breadcrumbs: They stay crispier than regular breadcrumbs, and the texture contrast against the soft mozzarella really matters when you bite in.
- Grated Parmesan cheese: Adds a salty, umami punch that transforms plain breadcrumbs into something memorable.
- Dried Italian herbs: If you have fresh rosemary or oregano, feel free to use that instead—dried works beautifully here though.
- Mini brioche slider buns: The buttery richness is non-negotiable; regular whole wheat or hamburger buns will taste noticeably different and less indulgent.
- Basil pesto: This is where personality enters the equation—store-bought is totally fine, or use homemade if you've got it.
- Marinara sauce: A good quality jar makes all the difference; cheap marinara can taste metallic and bitter once it hits the cheese.
- Shredded mozzarella cheese: Freshly shredded melts way better than pre-packaged, though pre-packaged works if you're in a time crunch.
- Melted butter: Brushed over the tops, it gives the buns a beautiful golden finish and makes them crispy enough to stand up to all that filling.
- Fresh parsley: A garnish that looks professional but honestly tastes better than it looks, adding a bright peppery note at the end.
Tired of Takeout? 🥡
Get 10 meals you can make faster than delivery arrives. Seriously.
One email. No spam. Unsubscribe anytime.
Instructions
- Preheat and prep:
- Set your oven to 400°F and line a baking sheet with parchment paper to save yourself a cleanup headache later. While the oven warms up, you'll have time to gather everything else without feeling rushed.
- Coat the chicken:
- Toss your chicken pieces with olive oil, garlic powder, salt, and pepper in a bowl, making sure every piece gets touched by the oil and seasoning. This step takes less than two minutes but makes a real difference in flavor.
- Breadcrumb dredging:
- Mix panko, Parmesan, and Italian herbs in a shallow dish, then roll each chicken piece in the mixture, pressing gently so the coating sticks. The Parmesan mixed right into the breadcrumbs means every bite has cheese flavor, not just where you see it.
- Bake the chicken:
- Spread the breaded pieces on your parchment-lined baking sheet and slide them into the oven for 15 to 18 minutes, until they're golden and cooked through. You'll know they're done when they feel firm to the touch and the coating is crispy.
- Prepare the buns:
- While the chicken bakes, slice your mini brioche buns in half and spread about 2 teaspoons of pesto on each bottom half. The pesto acts as a flavor anchor and prevents the bun from getting soggy from the marinara.
- Layer and assemble:
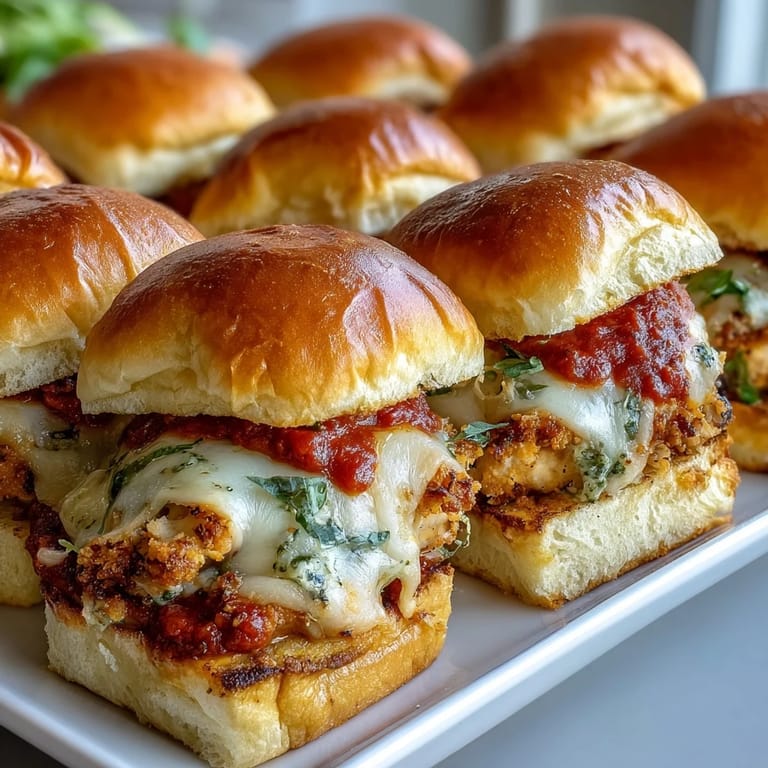
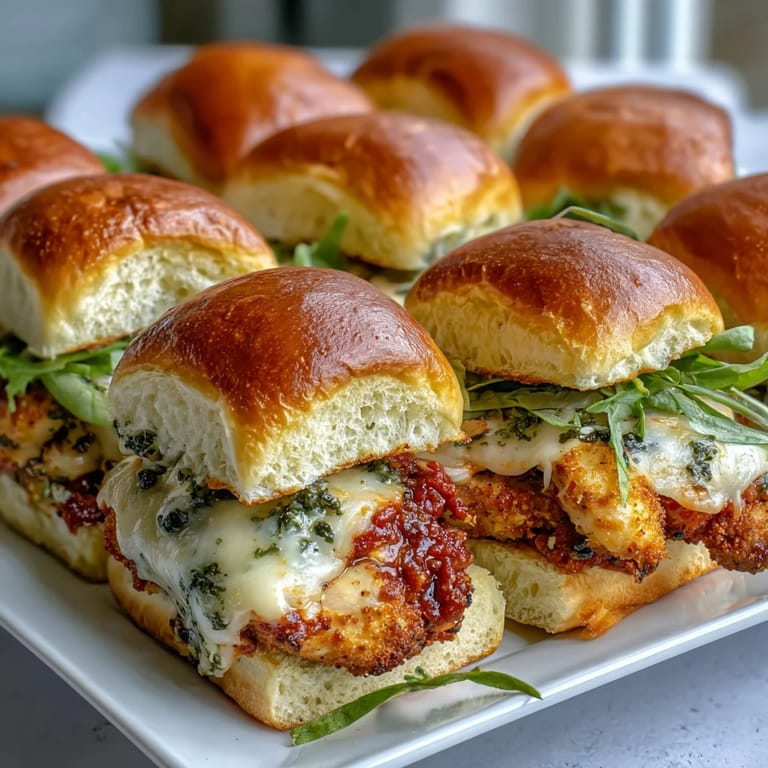
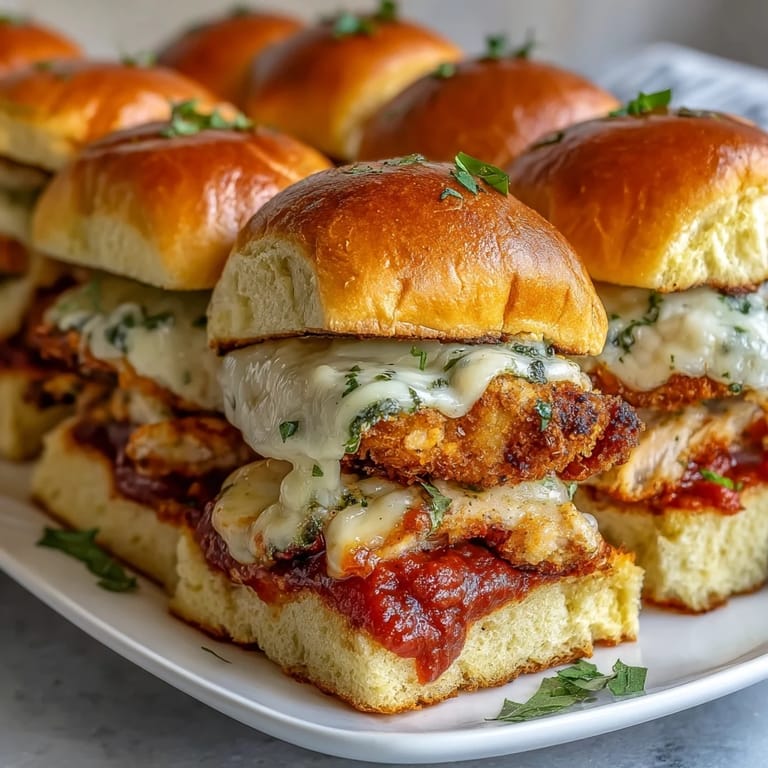
- Once the chicken is done, place one piece on each pesto-covered bun bottom, add about 1 tablespoon of marinara on top of the chicken, then crown it with a handful of shredded mozzarella. Work quickly so the warm chicken helps start melting the cheese.
- Stack and butter:
- Pop the tops on your sliders and arrange them in a baking dish, then brush the tops generously with melted butter. This is the step that makes them look bakery-quality.
- Final bake and serve:
- Slide the whole pan back into the 400°F oven for just 5 minutes, until the cheese melts completely and the bun tops turn golden brown. Garnish with fresh parsley if you want them to look fancy, then serve while everything is still warm and the cheese is still gooey.
 Save to Pinterest
 I made these sliders one afternoon when my mom was visiting, and we stood in the kitchen sampling them right off the baking sheet, burning our fingers on melted mozzarella and laughing about how something this delicious shouldn't be allowed to exist in such a small, handheld package. She took the recipe home and texted me a photo two weeks later of her book club absolutely devouring them.
Why This Works as a Party Dish
These sliders hit the sweet spot between looking intentional and impressive while actually being forgiving enough to make without stress. You can prep the chicken the morning of, refrigerate it, and then bake everything when guests arrive, so you're not covered in breadcrumbs and sweat when people show up. The mini brioche bun keeps everything contained, which means people can eat these without a plate or napkin (though napkins still help), making them perfect for standing and mingling situations.
Shortcuts and Smart Swaps
Sometimes I use shredded rotisserie chicken from the grocery store and toss it with pesto instead of breading and baking chicken from scratch, which cuts your active cooking time almost in half. You could also swap the mozzarella for provolone or fontina if that's what you have, or even a sharp white cheddar if you want more flavor punch. The marinara is flexible too—if you prefer a lighter touch, use less, or skip it entirely and let the pesto be the star.
Serving and Storage Genius
Serve these warm right out of the oven when the cheese is still melted and the buns still have that butter-toasted crispness. Set out a small bowl of extra marinara for dipping, because people will want it even though the sliders are already full of it. If you have leftovers (and you might not), they reheat decently in a 350°F oven for about 5 minutes, though they're honestly best enjoyed fresh.
- Make sure your mozzarella is shredded and not in a block, because shredded melts so much more evenly across the chicken.
- If your pesto has pine nuts and someone at your gathering has a tree nut allergy, use a different pesto or make a quick basil oil instead.
- Keep the assembled sliders on a baking sheet until you brush them with butter—this prevents the filling from shifting around.
 Save to Pinterest
 These pesto chicken Parmesan sliders somehow manage to taste like you spent hours in the kitchen while actually fitting into a busy afternoon. Once you make them once, you'll find yourself reaching for this recipe whenever you need something that impresses without requiring actual stress.
Recipe FAQs
- → Can I make these sliders ahead of time?
Assemble the sliders up to step 7, then refrigerate up to 4 hours before baking. Add 2-3 minutes to the final bake time if baking cold from the refrigerator.
- → What's the best way to reheat leftover sliders?
Reheat in a 350°F oven for 5-7 minutes until warmed through and cheese melts again. Avoid microwaving, which makes the buns soggy and the chicken rubbery.
- → Can I use store-bought chicken tenders?
Yes, frozen breaded chicken tenders work well as a shortcut. Bake according to package directions, then slice to fit slider buns and proceed with assembly.
- → How do I prevent buns from getting soggy?
Toast cut sides of buns lightly before spreading pesto, and don't overload with sauce. A thin layer of pesto creates a barrier against moisture from the chicken and marinara.
- → What sides pair well with these sliders?
Serve with a crisp green salad, garlic knots, or roasted vegetables. For party spreads, pair with other finger foods like meatballs, bruschetta, or antipasto skewers.
- → Can I make these gluten-free?
Use gluten-free brioche-style buns and substitute panko with gluten-free breadcrumbs. Ensure all sauces and pesto are certified gluten-free as well.