 Save to Pinterest
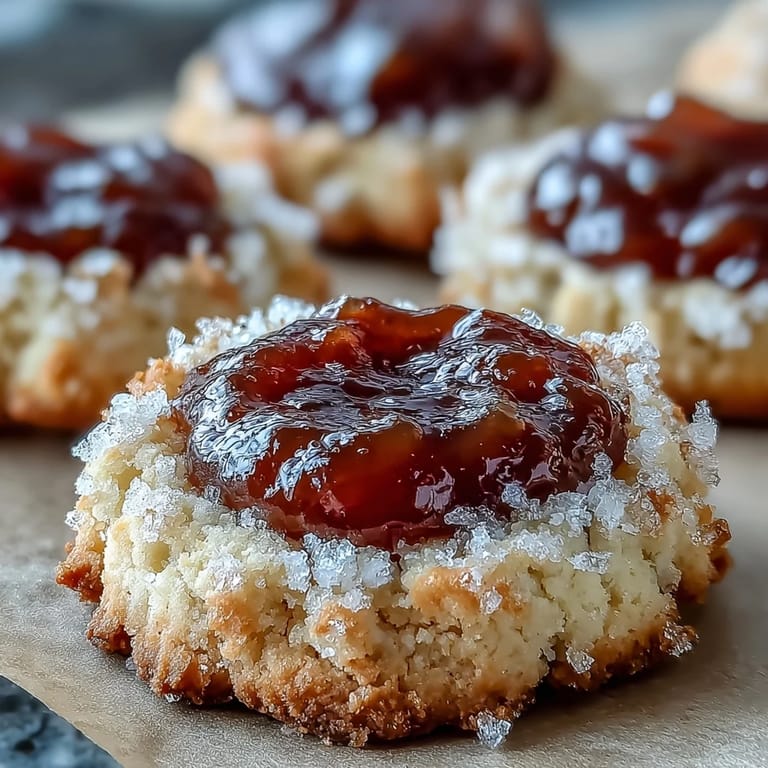
 My neighbor brought over a tin of these guava jam thumbprint cookies one summer afternoon, and I couldn't stop eating them straight from the box. There was something about the way the sweet-tart jam burst against the buttery cookie that felt both simple and special, like she'd unlocked some secret combination I didn't know existed. I pestered her for the recipe, and when she finally handed it over, I realized how forgiving and quick these actually are to make. Now they're my go-to when I need something that looks more impressive than it actually is.
I made these for a book club meeting once, and a friend who claims she never eats sweets ate four of them without thinking about it. Watching her reach for another while debating a plot point taught me that these cookies have an unassuming charm that disarms even the skeptics. They disappeared before anyone left the table, which felt like the highest compliment.
Ingredients
- All-purpose flour (2 cups): The foundation that keeps these cookies tender rather than cakey, so don't skip the measurement.
- Unsalted butter (1/2 cup, softened): Softened is the key here because cold butter won't cream properly with the sugar, and creaming is where the fluffiness comes from.
- Granulated sugar (1/2 cup): This sweetens the dough just enough so the guava jam becomes the real flavor star.
- Salt (1/4 teaspoon): A tiny pinch that makes the buttery flavor taste more like itself.
- Large egg (1): Binds everything together and adds richness without being heavy-handed about it.
- Vanilla extract (1 teaspoon): Use real vanilla if you can; the flavor difference is noticeable in something this simple.
- Guava jam (1/2 cup): The whole point of the cookie, so choose one you actually enjoy eating straight from the jar.
Tired of Takeout? 🥡
Get 10 meals you can make faster than delivery arrives. Seriously.
One email. No spam. Unsubscribe anytime.
Instructions
- Set your oven and prep:
- Preheat to 350°F and line your baking sheets with parchment paper so you're not fussing around once the dough is ready. This step takes two minutes and saves you from sticking and burning later.
- Combine the dry ingredients:
- Whisk flour and salt together in a medium bowl and set it aside. This simple step prevents lumps and ensures the salt is distributed evenly throughout.
- Cream butter and sugar:
- Beat the softened butter and sugar in a large bowl for about 2 to 3 minutes until it looks light, fluffy, and noticeably paler than when you started. You'll know it's ready when you run a spatula through it and see how much air you've incorporated.
- Add egg and vanilla:
- Beat in the egg and vanilla extract until everything is well combined and the mixture looks smooth. Don't skip this step or you'll end up with dense, flat cookies.
- Bring it all together:
- Gradually add the flour mixture to the wet ingredients, stirring gently until a soft dough forms and no streaks of flour remain. The dough should feel supple and a little sticky, not stiff.
- Shape the cookies:
- Scoop tablespoon-sized balls of dough and roll them between your palms until they're roughly the size of walnuts, then place them 2 inches apart on the baking sheets. You should get about 24 cookies, which feels generous for such little effort.
- Make the indentations:
- Use your thumb or the back of a small rounded teaspoon to press a gentle well into the center of each dough ball. Go slowly so you don't crack the sides, and aim for a depth of about 1/4 inch.
- Add the jam:
- Fill each indentation with roughly 1/2 teaspoon of guava jam, being careful not to overfill because it will bubble out slightly during baking. A little overflow is actually fine and adds to their homemade charm.
- Bake until golden:
- Bake for 13 to 15 minutes until the edges are just barely golden but the center still looks tender. The cookies will continue cooking slightly on the hot pan after you pull them out, so don't wait for them to look fully done.
- Cool and transfer:
- Let them sit on the baking sheet for 5 minutes so they set up enough to handle, then move them to a wire rack to cool completely. If you try to move them too early, they'll fall apart, so patience here pays off.
 Save to Pinterest
 There was a moment when my daughter, who's usually picky about anything homemade, bit into one of these and asked if I could make them every week. That's when I understood that good baking isn't about complexity or fancy ingredients; it's about taking time to do simple things well.
Why This Cookie Works
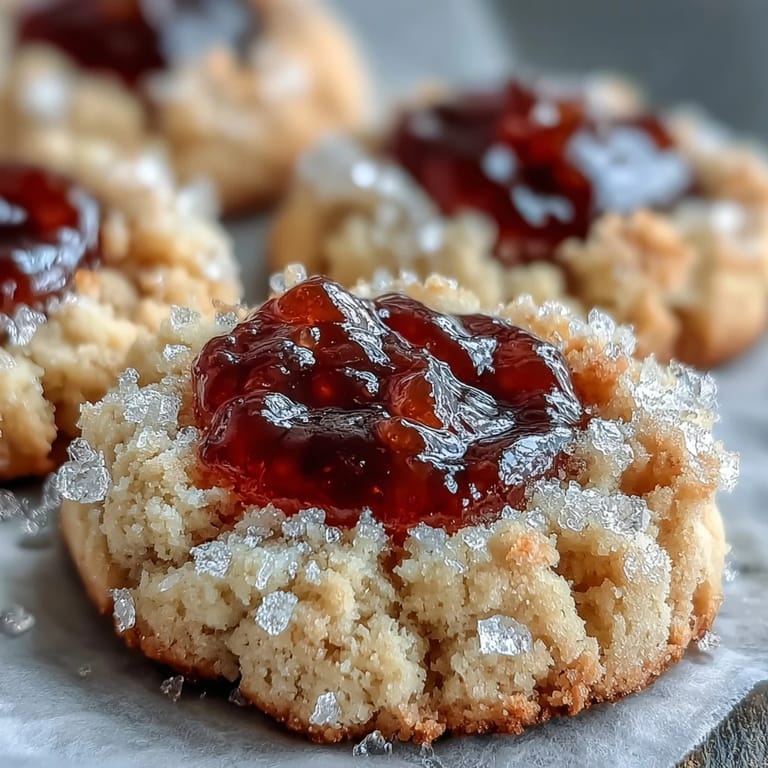
The magic here is in the balance between three things: a tender, buttery base that melts on your tongue, a hit of tart-sweet jam that wakes up your mouth, and the contrast of temperatures and textures when the jam is still slightly warm against the cool cookie. The cookie dough is forgiving because it doesn't require exact creaming or difficult techniques, yet it still delivers that satisfying homemade flavor that people actually notice. It's the kind of recipe that feels like a secret weapon because it's so straightforward that no one expects it to taste this good.
Flavor Variations to Consider
The beauty of a thumbprint cookie is that it's essentially a blank canvas waiting for whatever jam is sitting in your cupboard. Raspberry and apricot are natural swaps if you're not a guava fan, but I've also used strawberry preserves, blackberry jam, and even a spoonful of lemon curd with beautiful results. Mango jam would lean into that tropical vibe, or if you're feeling adventurous, try a tart passion fruit curd for something with a real punch.
Storage and Make-Ahead Tips
These cookies keep beautifully in an airtight container at room temperature for up to 5 days, though they rarely last that long in my house. You can actually prepare the dough a day ahead and refrigerate it, then scoop, fill, and bake them fresh whenever you want warm cookies without the full effort. If you want to get ahead for a gathering, bake them the morning of and store them uncovered on a rack until serving time so the edges stay crisp.
- Freeze unbaked dough balls on a baking sheet, then transfer to a freezer bag and bake from frozen, adding just a minute or two to the baking time.
- A tiny sprinkle of shredded coconut, crushed pistachios, or even a pinch of cinnamon on top of the jam before baking adds a professional touch that tastes intentional.
- If your jam is very thick and won't dollop easily, warm it slightly in the microwave for 10 seconds to loosen it up.
 Save to Pinterest
 These cookies have become my answer to the question of what to bring when I don't want to overthink it but still want to show up with something real and homemade. They're proof that the most satisfying things in the kitchen don't require a PhD in baking.
Recipe FAQs
- → Can I use other fruit jams instead of guava?
Absolutely. Raspberry, apricot, strawberry, or mango preserves work beautifully. Choose jams with similar consistency for best results.
- → Why do my cookies spread too much?
This often happens if the dough is too warm. Chill the shaped dough for 15-20 minutes before baking if your kitchen is warm. Also ensure you measure flour correctly.
- → How should I store these cookies?
Keep in an airtight container at room temperature for up to 5 days. Place parchment paper between layers to prevent sticking. The flavors actually develop more depth after a day.
- → Can I freeze the dough or baked cookies?
Yes, both freeze well. Freeze shaped dough balls on a baking sheet first, then transfer to bags for up to 3 months. Add jam before baking. Baked cookies freeze for up to 2 months.
- → How do I know when they're done baking?
Look for lightly golden edges while centers remain pale. The jam should be bubbly but not overflowing. They'll firm up as they cool during the 5-minute rest period.