 Save to Pinterest
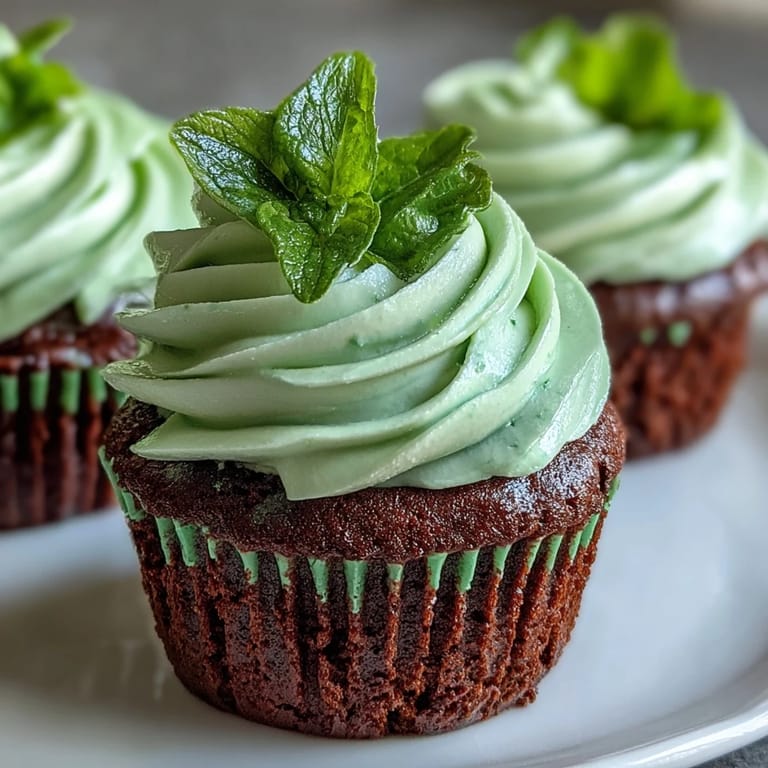
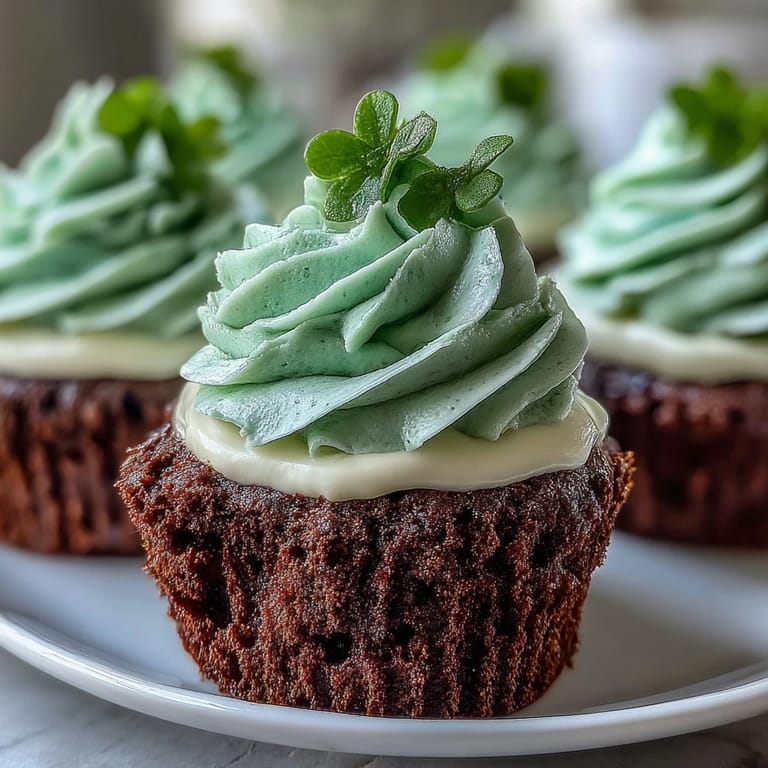
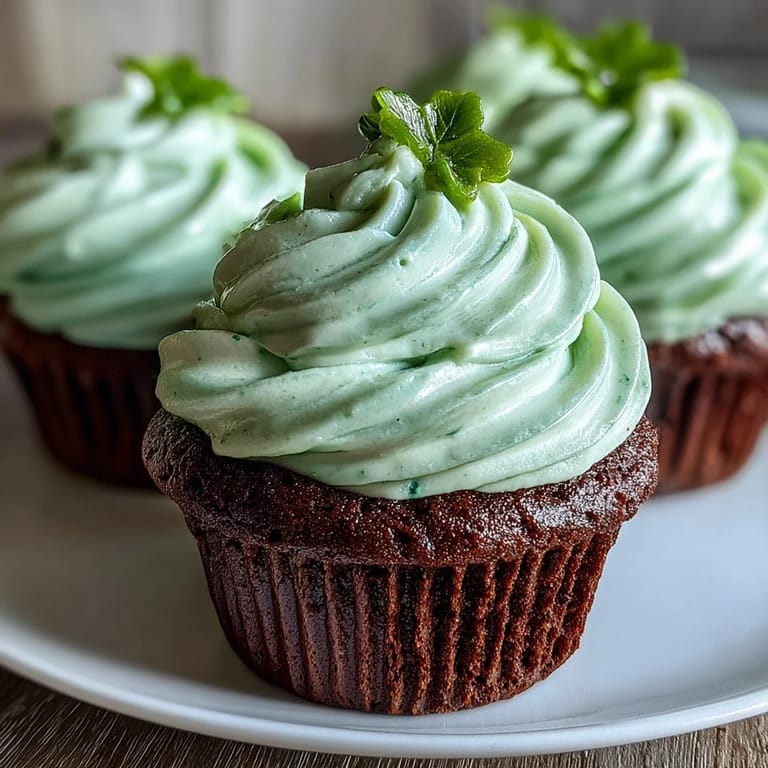
 My kitchen smelled like cocoa and vinegar the first time I decided to make something green for St. Patrick's Day that didn't involve food coloring disasters. A friend had mentioned green velvet cupcakes in passing, and I became oddly obsessed with the idea of that jewel-toned green paired with creamy frosting. When I finally mixed that gel coloring into the batter and watched it transform into this gorgeous emerald hue, I felt like I'd cracked some kind of code. These cupcakes became my favorite way to celebrate without falling into the typical green beer trap.
I made these for a potluck once, nervous they'd get lost among the regular chocolate desserts, but three people asked for the recipe before the party ended. Someone even texted me the next day saying they'd made a second batch. That's when I realized these weren't just a holiday gimmick—they were genuinely good cupcakes that happened to be festive.
Ingredients
- All-purpose flour (1 1/4 cups): This is your structure, so measure by spooning and leveling, not scooping straight from the bag, or you'll end up with dense cupcakes.
- Granulated sugar (3/4 cup): Don't be tempted to reduce this—the sugar helps keep everything moist and tender.
- Unsweetened cocoa powder (1/4 cup): This is what gives you that sophisticated flavor that makes people pause and wonder what's in there.
- Baking soda (1/2 teaspoon): The vinegar reacts with this to create lift and texture, so both are essential to the magic happening.
- Salt (1/4 teaspoon): Just enough to wake up all the flavors without making anything taste salty.
- Buttermilk (2/3 cup): Use room temperature so it mixes smoothly—cold buttermilk can seize up the batter.
- Vegetable oil (1/2 cup): Oil keeps these incredibly moist; don't swap it for butter as a one-to-one replacement or the texture changes.
- Eggs (2 large): Room temperature eggs blend in better and create a smoother batter.
- Vanilla extract (1 teaspoon): Use real vanilla if you can—it makes a difference in the frosting especially.
- Distilled white vinegar (1 teaspoon): This reacts with the baking soda and adds a subtle tang that balances the sweetness.
- Green gel food coloring (1 tablespoon): Gel is crucial here because liquid coloring thins the batter and won't give you that vibrant green.
- Cream cheese (8 oz): Softened at room temperature so it beats up fluffy and smooth, not lumpy.
- Unsalted butter (1/4 cup): Softened butter whips with the cream cheese to create that dreamy frosting texture.
- Powdered sugar (2 cups): Sift it first or you'll have little lumps hiding in the frosting.
- Green sprinkles or shamrock candies: Optional but they do make these feel special and finished.
Tired of Takeout? 🥡
Get 10 meals you can make faster than delivery arrives. Seriously.
One email. No spam. Unsubscribe anytime.
Instructions
- Set yourself up for success:
- Preheat your oven to 350°F and line your muffin tin with cupcake liners—this prevents sticking and makes cleanup actually pleasant. Room temperature ingredients are your friend here, so pull out the eggs and buttermilk about 20 minutes before you start mixing.
- Build your dry base:
- Whisk together flour, sugar, cocoa powder, baking soda, and salt in a large bowl, making sure there are no cocoa lumps hiding anywhere. The whisking incorporates air and distributes the leavening evenly so every cupcake rises the same way.
- Blend your wet mixture:
- In a separate bowl, whisk buttermilk, oil, eggs, vanilla, vinegar, and green food coloring until the color is uniform and everything looks smooth. This is where the magic green develops, so keep whisking until there are no streaks of white.
- Marry wet and dry gently:
- Pour the wet ingredients into the dry and fold together with just a few strokes of your spatula—stop as soon as you don't see flour anymore. Overmixing develops gluten and turns your cupcakes tough, and nobody wants that.
- Fill and bake:
- Divide the batter evenly among the liners, filling each about two-thirds full, then slide the tin into your preheated oven. Bake for 16 to 18 minutes, checking with a toothpick around the 16-minute mark—it should come out clean or with just a few moist crumbs.
- Cool with patience:
- Let the cupcakes sit in the tin for 5 minutes so they firm up slightly, then transfer them to a wire rack and let them cool completely. Frosting warm cupcakes is a melted mess, so resist the urge to rush this part.
- Make your frosting:
- Beat softened cream cheese and butter together until smooth and fluffy, about 2 minutes, then add your sifted powdered sugar gradually while beating. Once it's light and fluffy, add vanilla and beat once more until everything is completely incorporated.
- Frost like you mean it:
- Once cupcakes are cool, generously frost each one using a spatula for swirls or a piping bag for something fancier. Top with green sprinkles or shamrock candies if you want them to really shine on the dessert table.
 Save to Pinterest
 There's something special about bringing green velvet cupcakes to a gathering—they're unexpected, they're vibrant, and they taste like someone actually put thought into making them. People remember them, and honestly, that's what good desserts do.
Why Green Velvet Works
Velvet cakes sit in this interesting middle ground between cake and brownie, tender but with just enough cocoa presence to feel sophisticated. The green color makes them feel festive and modern without being cheesy, and the buttermilk-vinegar combo keeps everything incredibly moist. When you add cream cheese frosting, you've got a dessert that's celebratory but also genuinely delicious, which is harder to pull off than it sounds.
Storage and Make-Ahead Tips
Unfrosted cupcakes stay fresh in an airtight container for three days at room temperature, or freeze them unfrosted for up to a month. Frosted cupcakes are best eaten within two days if you leave them out, or they'll keep in the fridge for up to five days covered. If you're making these ahead of a party, bake and cool the cupcakes a day early, then frost them the morning of—they'll look fresher that way.
Variations and Swaps
These cupcakes are naturally vegetarian, but if you need them dairy-free, swap the buttermilk for non-dairy milk mixed with vinegar, use plant-based butter and cream cheese, and everything works beautifully. You could also skip the green coloring entirely and make classic red velvet if St. Patrick's Day isn't your thing, or experiment with other gel colors to match your mood. The structure of these cupcakes is forgiving enough that you can play around without breaking anything.
- Try swapping half the cocoa powder for espresso powder if you want the chocolate flavor more pronounced.
- A tiny pinch of cinnamon in the batter adds warmth without changing the overall flavor profile.
- Make the frosting slightly less sweet by using a touch less powdered sugar if you find standard recipes cloying.
 Save to Pinterest
 These green velvet cupcakes have a way of turning an ordinary Wednesday into something worth celebrating. Bake them, watch people's faces light up, and enjoy the moment.
Recipe FAQs
- → What gives the cupcakes their green color?
The vibrant green hue comes from using green gel food coloring, which provides rich color without thinning the batter.
- → Can I substitute the dairy ingredients?
Yes, you can use plant-based cream cheese, butter, and buttermilk alternatives for a dairy-free version that maintains texture and flavor.
- → How do I know when the cupcakes are fully baked?
Insert a toothpick into the center of a cupcake; if it comes out clean or with a few moist crumbs, the cupcakes are done baking.
- → What is the best way to frost the cupcakes?
Once cooled, frost cupcakes generously using a spatula or piping bag for a smooth, creamy finish that pairs well with the tender cake.
- → Are there tips to enhance the flavor of these cupcakes?
Using high-quality vanilla extract and not overmixing the batter helps keep the cupcakes tender and flavorful. Also, pairing with Irish coffee or milk can enhance the experience.